Graphy is an all-in-one platform that helps creators create and sell online courses, host webinars, and manage communities with customizable websites and apps. It also offers marketing tools, payment options, and features to engage users, making it easier for educators to grow and earn from their content.
- User-friendly interface
- Supports live and pre-recorded classes
- Built-in payment gateway with multiple options
- Strong customer support
- White-label branding for a professional look
- Some features may require a higher-tier plan
- Limited advanced analytics
Price: $49/mo
At first, I wasn't sure about Graphy. With so many course platforms out there, I wondered what made it stand out. But after taking a closer look, I understood why it’s getting so much attention.
Graphy offers more than just hosting courses. It provides built-in marketing tools, a customizable website and app, and everything you need to grow an online business all in one place. It’s user-friendly for beginners but also powerful enough for experienced creators.
Of course, every platform has its pros and cons. In this Graphy review, I’ll walk you through both so you can decide if it’s the right choice for you. Let’s get in!
What Is Graphy?

Graphy is a simple online platform for creators to build and sell courses, host webinars, and manage communities.
You can easily create your own website or mobile app without any technical skills. With Graphy, you can add videos, quizzes, and other content to make your courses more engaging.
It also offers marketing tools like landing pages, discount coupons, and affiliate programs to help attract more students. Payments are easy, with multiple pricing options and support for various payment gateways.
Plus, Graphy provides 24/7 customer support, making it a complete solution for anyone who wants to share their knowledge and grow an online learning community.
Who Is Graphy For?
Graphy is built for anyone looking to create and sell online courses, host webinars, or build a learning community. It’s a great choice for:
- Coaches & Educators – Share your expertise, teach online, and turn your knowledge into a source of income.
- Content Creators – Build structured courses and grow your audience while monetizing your skills.
- Businesses & Brands – Train employees, offer educational content, or set up a branded learning platform.
- Institutes & Schools – Provide online classes, manage students, and expand your reach with ease.
Whether you’re an individual expert or part of a larger organization, Graphy simplifies the process of sharing knowledge, engaging learners, and growing your online presence.
Graphy Key Features
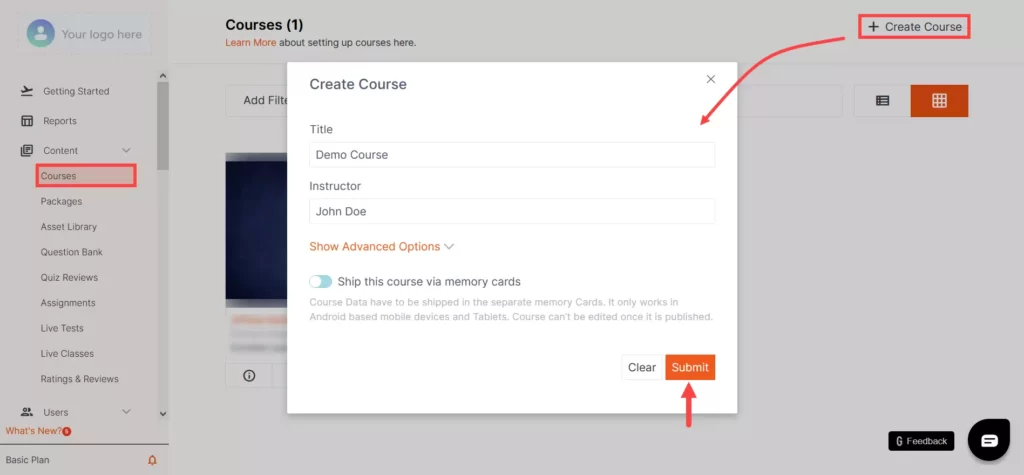
The Course Builder
Drag-and-drop builder, add unlimited courses, chapters, and content (video, PDF, audio, SCORM, live classes, quizzes, assignments, forms, links, text, files, subtitles).
Packages
You can bundle and offer two courses to your students by making a “Package” in Graphy. Instructors often offer packages at a discounted rate to make more profits and sell more material.
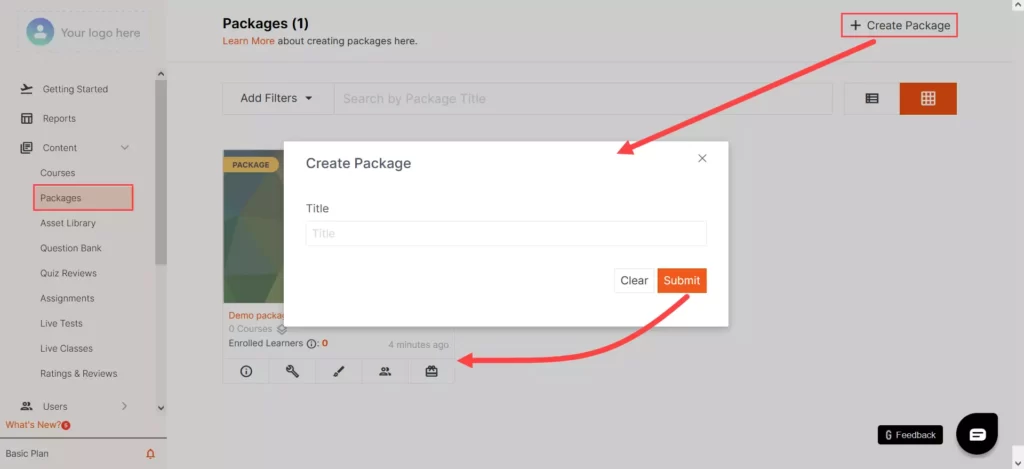
You can add and manage your packages by pressing the “Details” button underneath it.
The information section will offer you all the same controls that the information section for courses provides. You can edit the name of the course, change the pricing, design the landing pages, and take a look at the list of your learners.
One section that’s different from the packages section is the “Package Builder” section. This is where you can add your published courses and design the package for your learners.
Asset Library
The “Asset Library” section under “Content” gives you access to all assets you have uploaded across courses. You can search for the asset you’re looking for by name or use the many filters provided to find the asset you’re looking for.
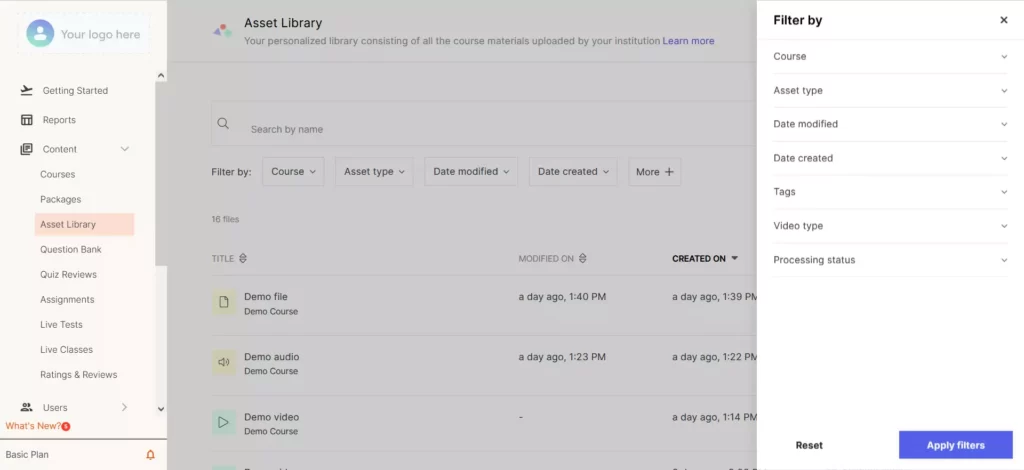
After you find the asset you’re looking for, clicking on it will allow you to see the details of the asset. Graphy also makes it easy for you to edit the asset – clicking on the “Edit” button will navigate you to its settings. You can also download the asset by clicking “Download.”
Question Bank
The “Question Bank” section under “Content” allows you to search through the questions you have added across courses. The section also enables you to upload questions in the .docx, .html, and .xls format. You can also add questions by clicking the “New Question” button on the top right.
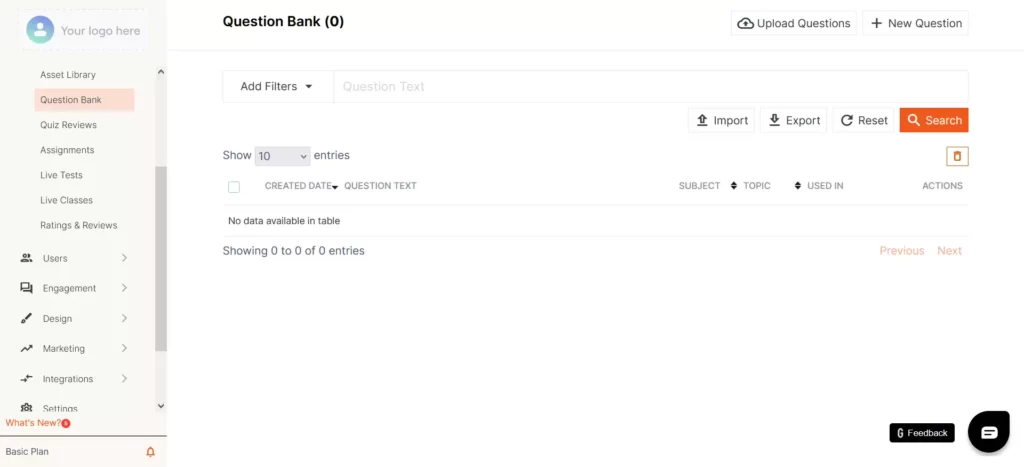
Searching through questions is easy with the text field and search button, and you can also mark and delete questions in bulk. Importing and exporting options make managing the material you’ve provided to your students easier.
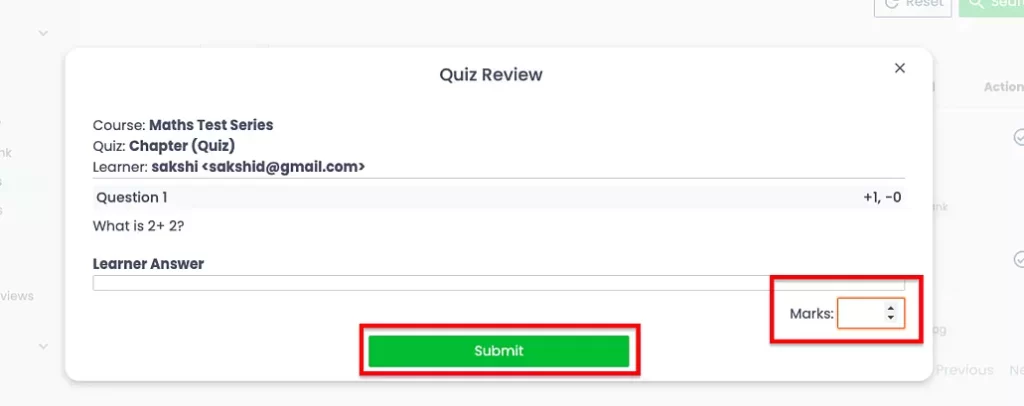
Quiz Reviews
This section, also present under “Content,” like the Question Bank section, allows you to review the quizzes you’ve provided your students.
You can review your students’ answers by clicking on the “Review” button in the “Actions” section.
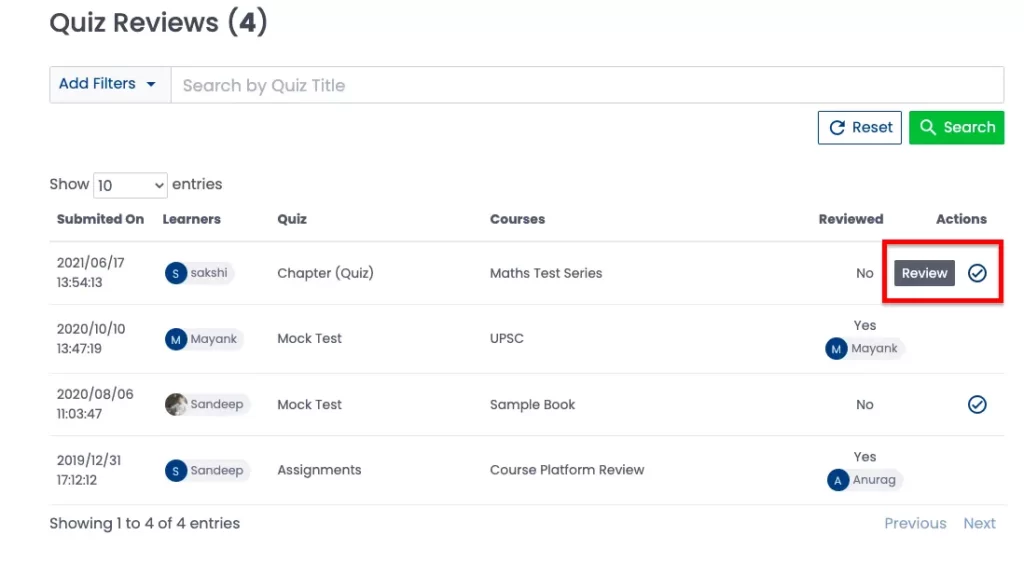
You can then go through your student’s answers and mark them accordingly.
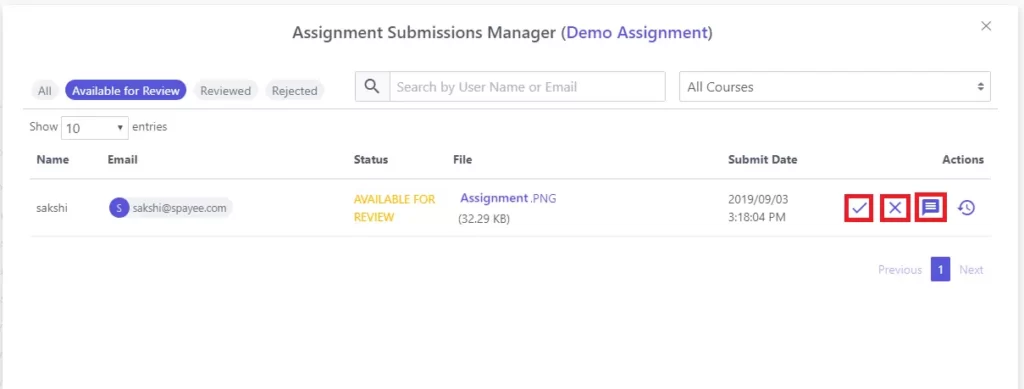
Assignments
The “Assignments” section enables you to go through the assignments your students have submitted. You can search through the assignments using the search box. Graphy will show how many assignments are available for review, how many you’ve reviewed, and how many you’ve rejected.
Clicking on an assignment will navigate you to the “Assignment Submissions Manager.” You will see all the details of the assignment and also all of the students’ information here.
Live Tests
Live tests are available for a fixed time window and allow you to test your students’ abilities. You can either manually generate the results of these tests or schedule them to be generated automatically. After the results are declared, your students will see the leadership board.
The “Live Tests” section under the “Content” section gives you access to all the live tests you have created. You can search through them and click on the “Results” icon under “Actions” to see the details about the test.
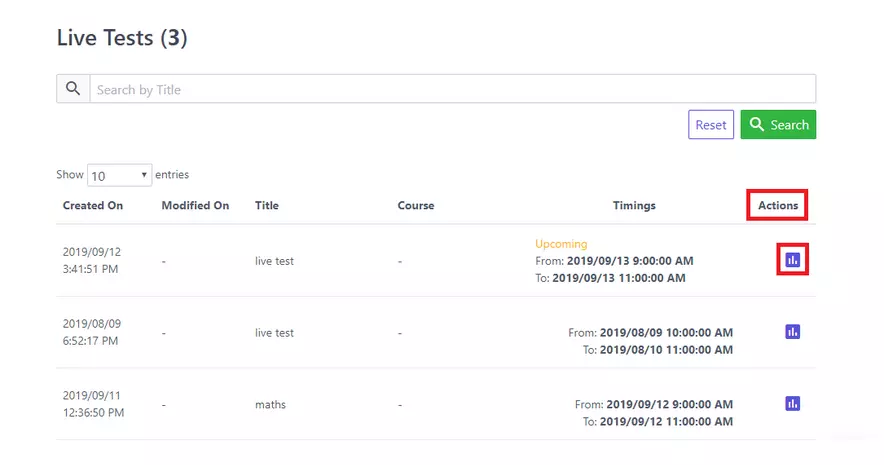
You will see the list of all the students who attempted the test and information such as the marks obtained, the number of questions attempted correctly, and skipped questions.
The Leaderboard will show you your students' rankings, and you can find their data in the “Submitted Attempts” and “Unsubmitted Attempts” sections.
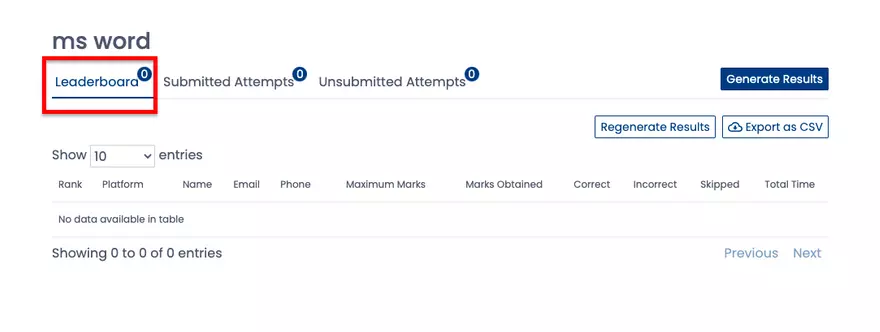
Clicking the “Generate Results” button will instantly generate the results for all of your students. They will receive their results in their email and will also be able to see them in their Graphy account.
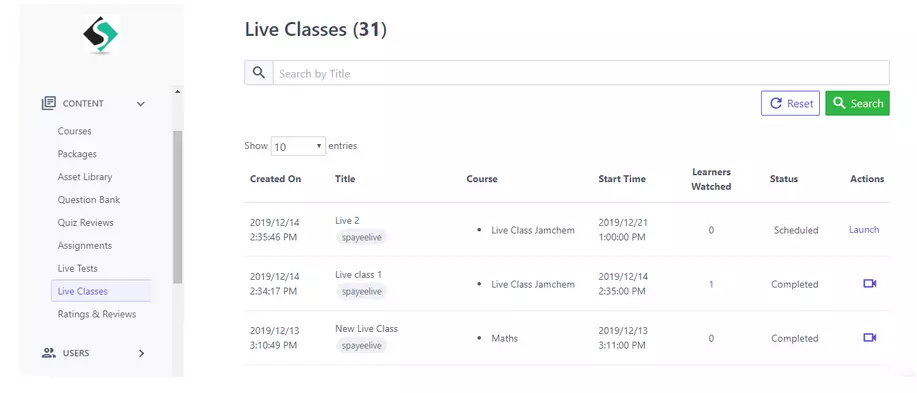
Live Classes
The Live Classes section gives you access to all of your previously conducted and scheduled live classes. From this section, you can find the live classes you have scheduled for later and click on the “Launch” button under “Actions” to go live and begin teaching.
Ratings & Reviews
This section allows you to see all the reviews your customers have left you. Graphy does not show any reviews on your course unless you approve them from this section. This allows you to keep fake reviews off your course.
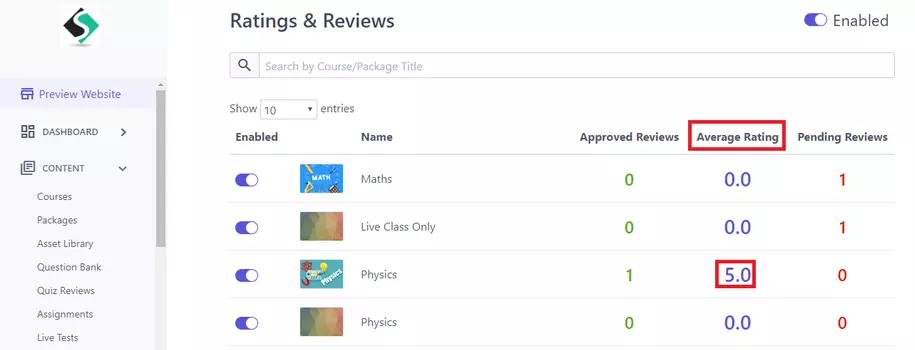
With this section, you can approve or reject posts and even mark them as “featured” if the review is particularly accurate. Graphy also allows you to disable ratings and reviews from your courses completely.
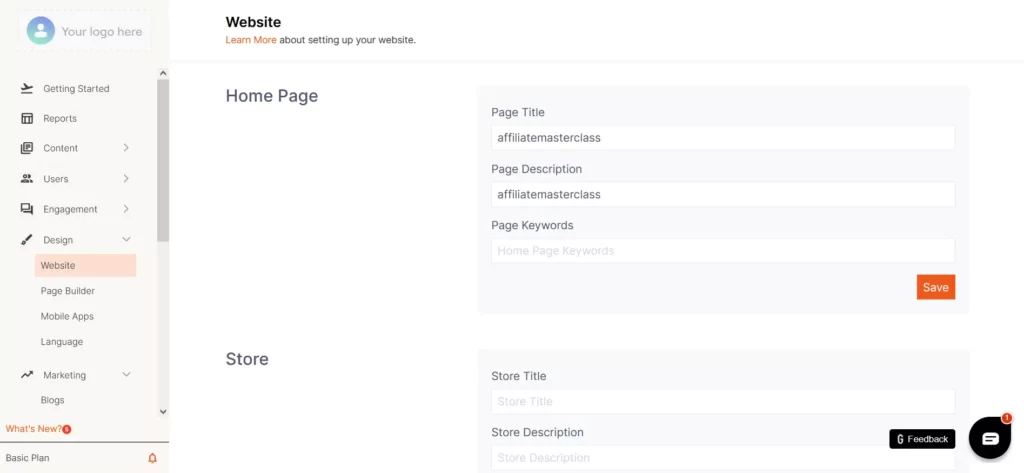
Design Features
Graphy makes it easy for you to customize how your webpage looks on the Graphy platform. You can choose a theme, customize the URLs of your pages, change the look and feel of the pages, add keywords to your pages for improved ranking on search engines, and more. Adding custom scripts is also easy with the options available under the “Website” section.
The “Page Builder” section allows you to add custom pages to your Graphy website. To add a page, click the “New Page” button at the top right and set up the URL.
Marketing Features
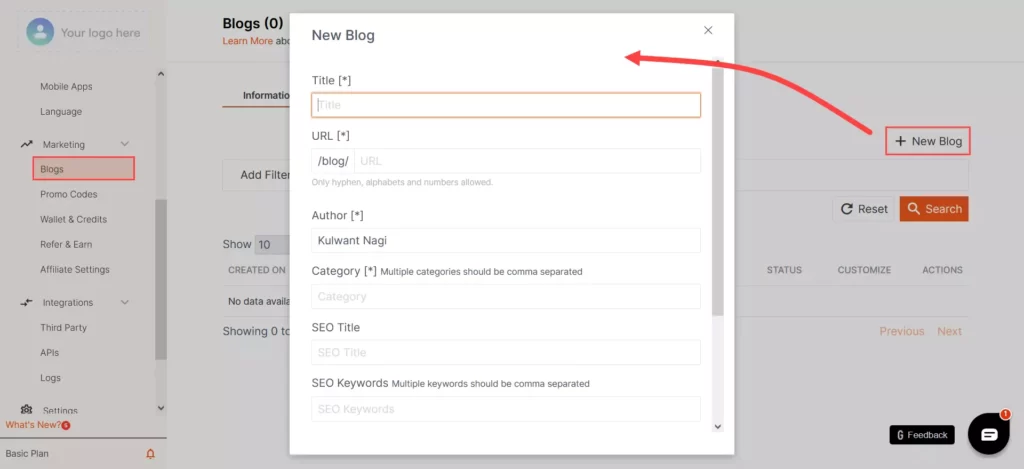
Graphy allows you to do everything from adding blogs to promo codes for your courses from the “Marketing” tab.
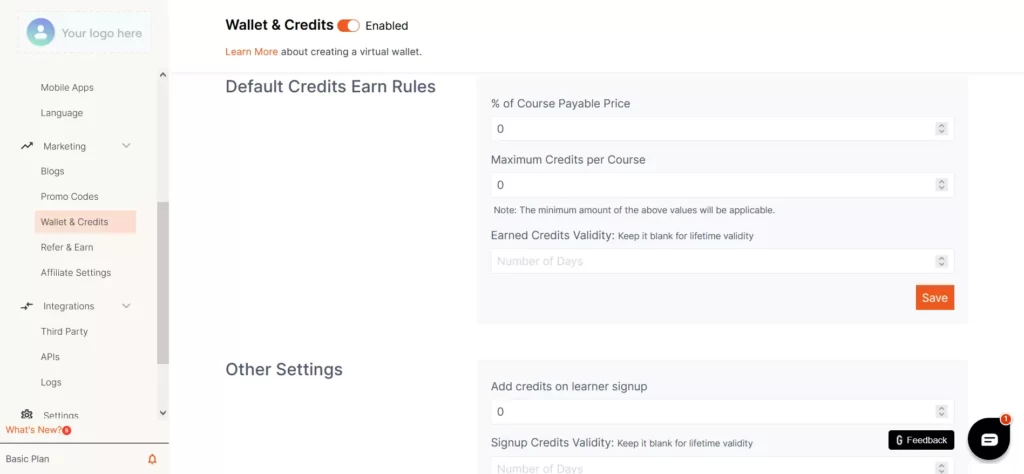
The “Wallets and Credits” section gives you the ability to convert the money your learners pay into “credits” or “coins.” You can make it so that your learners earn credits (think cash back) on the courses they buy.
Your learners can then use the credits they have to pay for other courses that you make.
The “Refer and Earn” and “Affiliate Settings” sections allow you further control over how much your affiliates and customers can earn by helping you sell more courses.
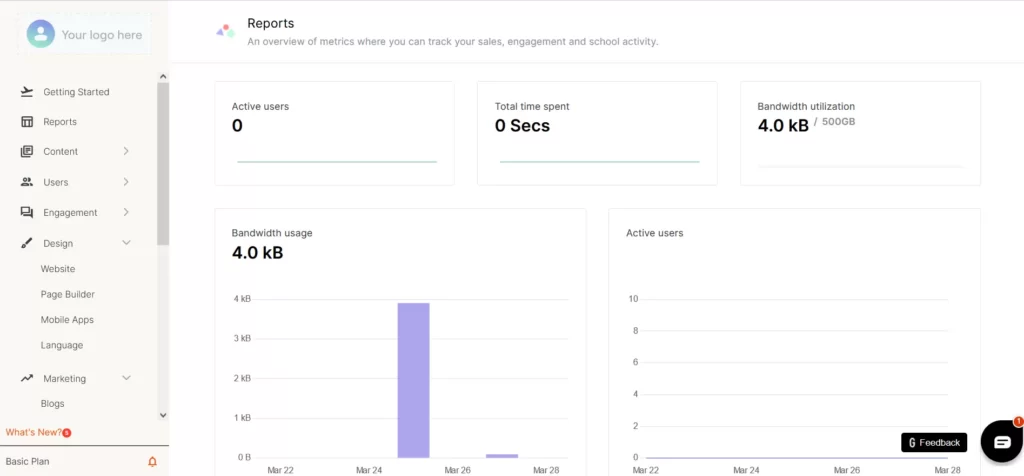
Reports
The Reports section provides all the details you need at a glance. It shows everything from total revenue to transactions and learning time. It also tracks bandwidth and usage, which we found quite impressive.
Graphy Free Trial

Graphy offers a 14-day free trial with no credit card required. During the trial, you get full access to most features:
- Create your own course website (e.g., yourname.graphy.com).
- Upload unlimited videos, PDFs, quizzes, and assignments.
- Use the course builder, set prices, and sell your course while keeping 100% of the earnings (no fees).
- Accept payments via UPI, cards, and EMI.
- Try the community feature and host live classes.
- View the student dashboard.
What you won't get during the trial:
- Custom mobile app.
- Custom domain (e.g., youracademy.com).
- DRM video protection.
- Removal of “Powered by Graphy” branding.
If you decide not to continue, your account pauses and no charges occur. If you like the platform, choose a plan on Day 14, and all your courses and earnings stay with you.
Graphy Pricing Plans
Graphy offers flexible pricing plans to cater to creators at different stages of their journey. Here's an overview of their current pricing options:
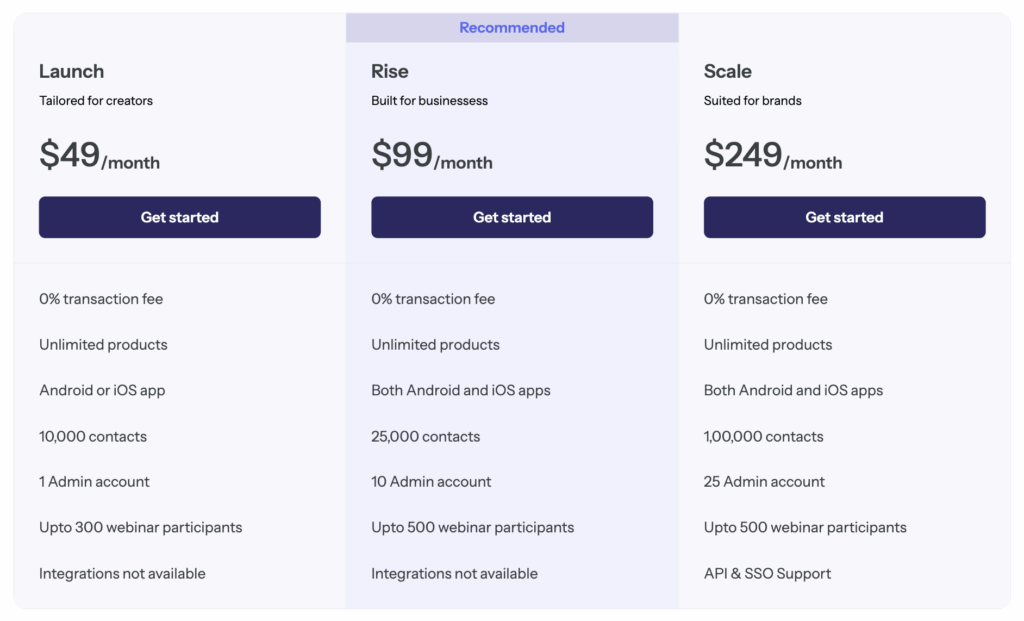
| Plan | Price (Monthly) | Contacts Allowed | Admin Accounts | Webinar Participants | Integrations/API/SSO |
|---|---|---|---|---|---|
| Launch | $49/mo | 10,000 | 1 | Up to 300 | Not available |
| Rise | $99/mo | 25,000 | 10 | Up to 500 | Not available |
| Scale | $249/mo | 100,000 | 25 | Up to 500 | API & SSO support |
Customer Support of Graphy
Graphy provides 24/7 customer support to assist users with any issues or questions. You can contact their team through live chat, email, or phone, ensuring you get quick and reliable help whenever needed.
They also offer a detailed help center with guides, tutorials, and FAQs, so you can find answers on your own.
Whether you're setting up your course, handling payments, or facing technical issues, Graphy's support team is always ready to help you smoothly run your online business.
Pros and Cons
Pros
- Easy to use, even for beginners
- No transaction fees on course sales
- Supports both live and recorded classes
- Comes with built-in marketing and payment tools
- 24/7 customer support for quick help
Cons
- Limited integrations with third-party tools
- Website customization options are basic
Should You Use Graphy?
If you're a creator, teacher, or coach who wants to sell courses online, Graphy is a strong option to consider. It offers useful features like unlimited course creation, live classes, and custom branding. One of the biggest benefits is that there are no transaction fees, so you get to keep all the money you make.
That said, it’s not perfect. If you’re new to using online tools, it might take some time to learn. Also, the higher-priced plans are packed with features but could be a bit expensive for smaller creators.
Overall, Graphy is a great choice if you're serious about growing a professional and flexible course platform. But if you're just getting started or working with a tight budget, it’s a good idea to try the free trial first or check out other options like Teachable or Thinkific. For experienced users or growing businesses, Graphy could be a great fit.
Graphy Alternatives to Consider
1. Teachable – A popular platform for creating and selling online courses. It offers an easy-to-use interface, built-in payment processing, and marketing tools. However, it charges transaction fees on lower plans.
2. Thinkific – A user-friendly course platform with strong customization options. It has a free plan, no transaction fees, and great community-building features. However, advanced features may require higher-tier plans.
3. Kajabi – An all-in-one platform for courses, memberships, and marketing. It includes powerful automation tools and website-building features. However, it is more expensive compared to other options.
Conclusion: Graphy Review 2026
While Graphy does not have a free plan, the offered plans are cheaper than Teachable.
Furthermore, Graphy provides many different ways for you to communicate with your students, including personal messaging.
Teachable charges a 5% fee on every transaction, but you won’t need to pay any such fees with Graphy. With a wider range of features, more affordable plans, and no extra costs, Graphy is undoubtedly the better pick.
Quicklinks:
- Thinkific Review: Best Course Creation Platform?
- Podia Review: An All-in-One Online Course Platform?
- Best Online Course Platforms
- Pageoptimizer Pro Review: Worth It For On-Page SEO?
- ClickMagick Review: Best Link Tracking Tool?
- Pluralsight Coupon Codes
FAQs
Yes, Graphy provides a free trial so you can explore its features before purchasing.
Yes, Graphy supports live classes with up to 500 students per session, depending on your plan.
Graphy integrates with tools like PayPal, Stripe, and Mailchimp for seamless payments and email marketing.
Yes, Graphy allows you to create unlimited courses on all plans.
KEY POINTS
Total Users
30,000+ creators have launched their online teaching businesses using Graphy.Website
Build a custom website by using the extensive template library.Payment Gateway
Sell globally with PayPal or Stripe, or use local payment providers like Instamojo or RazorPay.Integration
Improve your workflow with unlimited integrations like Zapier and Pabbly.Community
Create niche-based, private communities or Create an open community for your audience to meet and interact.