Being the second largest search engine after Google, YouTube has emerged as a great platform for content creators. Everyone wants to learn how to create a youtube channel and make money.
Artists, trainers, experts and many other professionals are just one step away to showcase their knowledge and skills to the world.
YouTube has 122 million daily users and it is one of the best platforms to highlight and increase your business’ reach.
Many stars have been born with the power of YouTube. BB ki Vines, MrBeast, PewDiePie, and Rihanna are few of the popular YouTubers. Their life has completely changed because of YouTube.
You have seen so many successful people around you. So you landed here by searching “How to start a YouTube channel.”
Sit tight, as we are going to explain everything step by step in this article and you are going to learn the exact process.
Let's start.
How to Start a Youtube Channel for Beginners
Now that we’ve outlined the YouTube Channel creation, let’s dive deeper to understand each and every step and learn how to create a youtube account.
Google Account Sign-In
To start the process on how to make a Youtube channel, we need to create a Google Account as Google is the parent company. If you already have a Google Account, you just need to sign in and open the Youtube homepage.
Now for those who don’t have one, to create a Google Account you need to add in your email address or your phone number and hit create an account on the bottom left as you can see in the image below.

You can observe a drop-down list to choose from the image. Here, you can create this account for yourself (as in a personal account), for your child and for your business or brand.
Now what is the difference here, a personal account will demand a specific email or password to log in every time but if you choose a business account you can add people to use and manage this account.
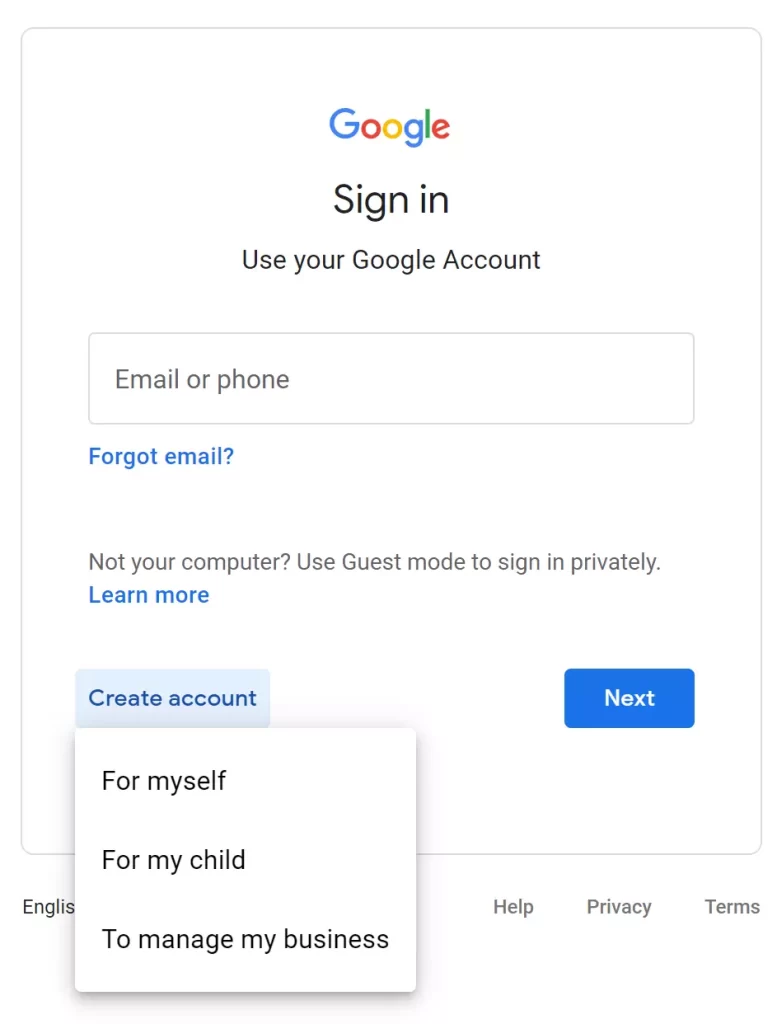
We advise you to choose a business account as it has additional features where you can change the name of your channel which cannot be achieved with a personal account.
You can observe in the picture below how the data collection for a business account is different.
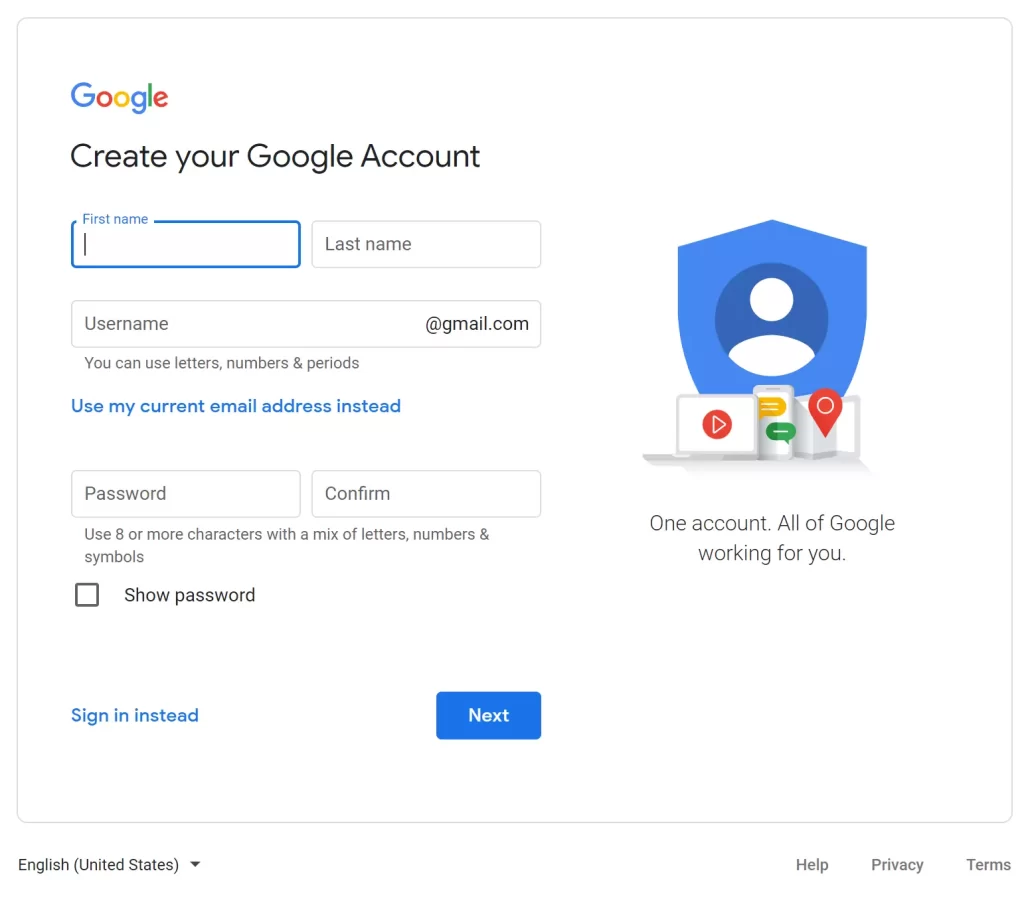
Once you fill in the data hit next and just like that you have created a new Google Account.
Create A YouTube Channel
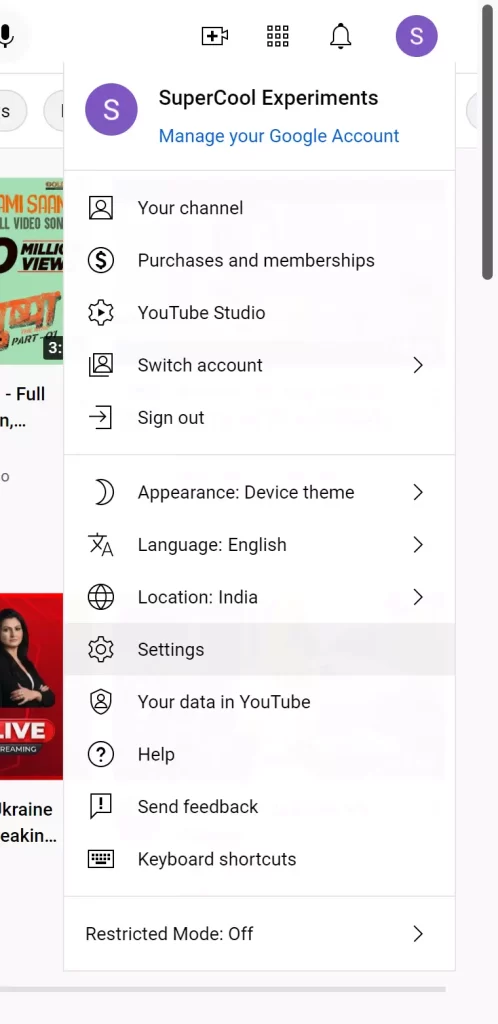
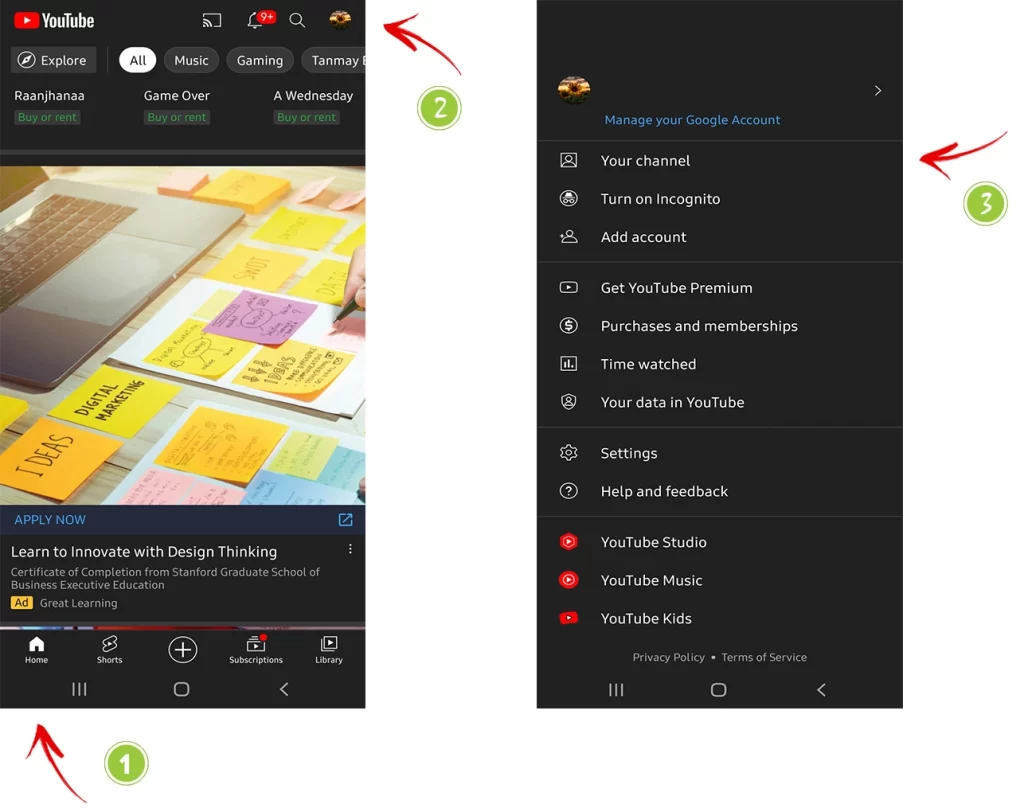
Now that we have a Google Account, let’s start working on how to make a new Youtube channel. First, let’s beeline to the Youtube homepage and select the signed-in account icon on the far top right corner.

There are two possibilities here, first, you want to create a new channel altogether and second that you want to create a channel other than a pre-existing one. The process for each is different and we will cover them both.
New Channel
From the list select ‘Create New Channel’ and a pop up will appear where you have to add a profile picture and a name for the channel.
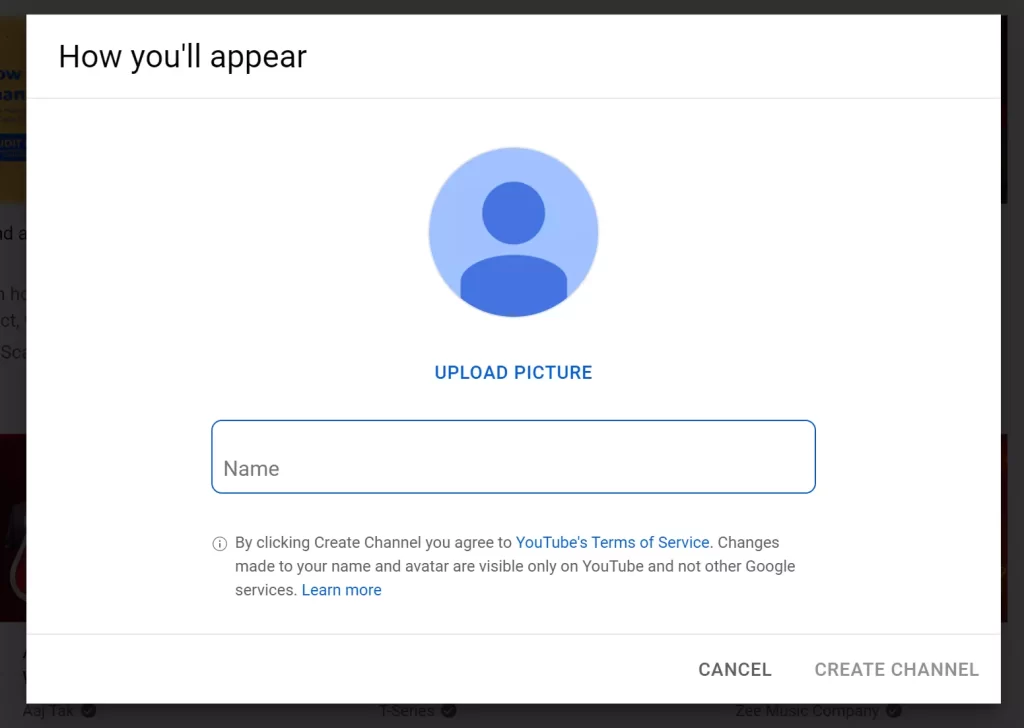
Try to keep your name as simple and relevant to your content so it is easy to locate. This name can be changed at any given time so you need not stress about that.
Hit ‘Create Channel’ and your channel is ready for use.
Existing
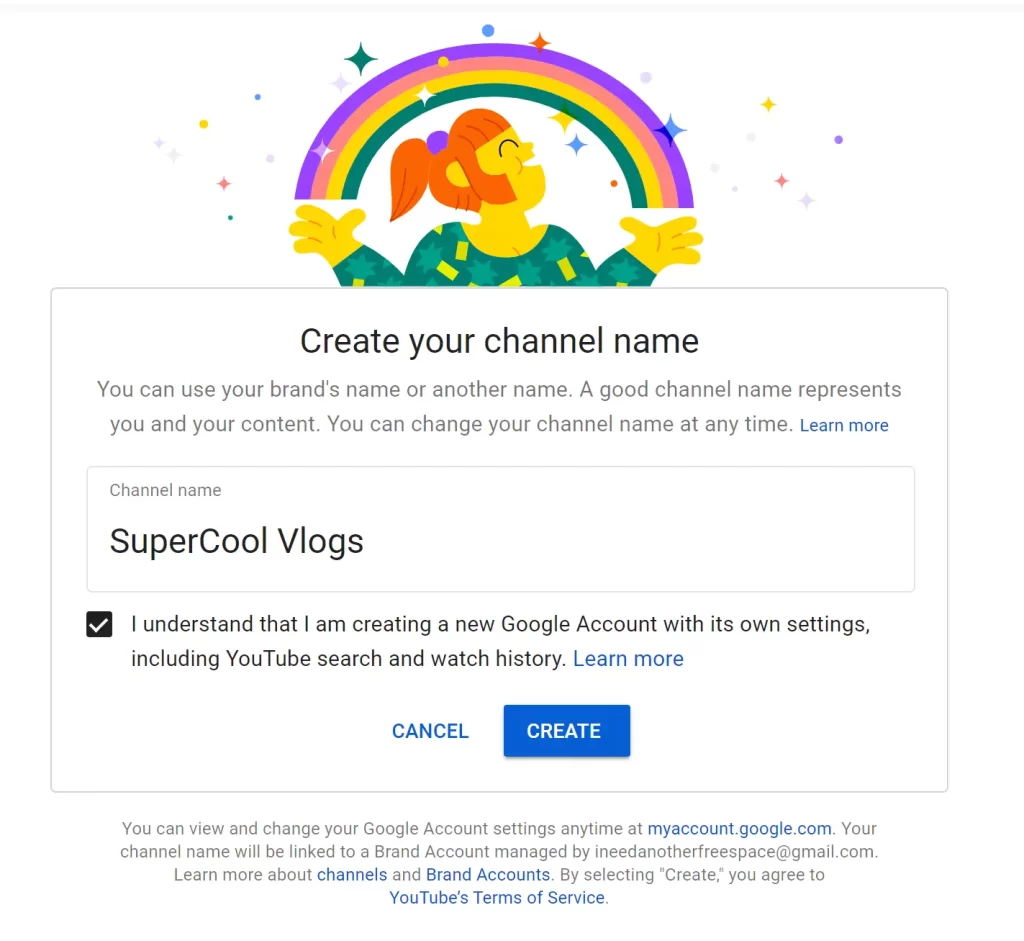
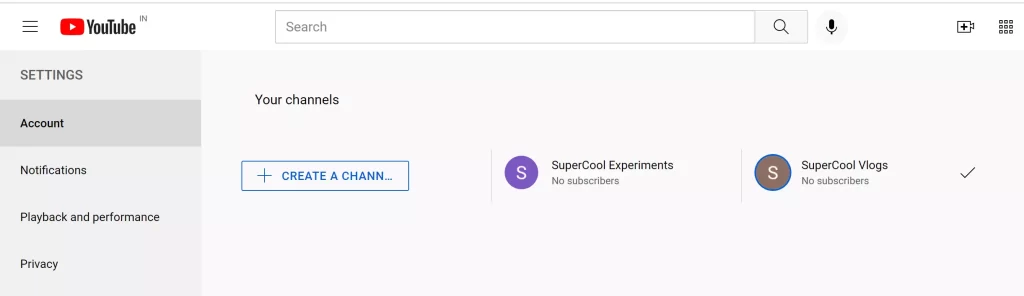
Now to create another channel than the existing one, you need to select ‘Settings’ from the drop-down list and choose the ‘Add and manage your channels’ link.
This will redirect you to your existing channel list where you can select to create a new channel.

Add the name for your channel and accept the terms by clicking the box and hitting create.
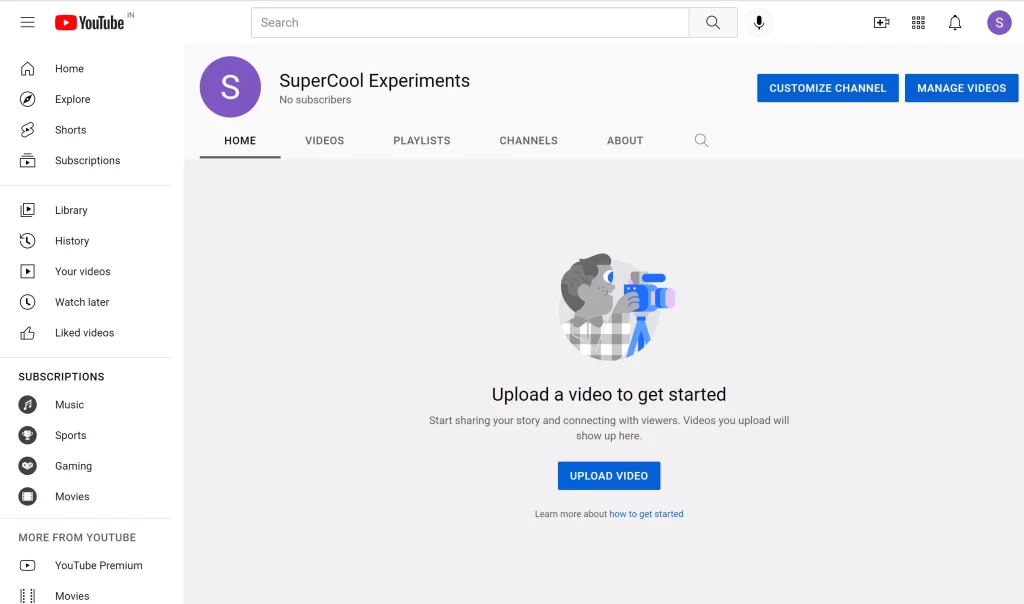
Just like that, you have created a new channel along with the existing ones. In the image below you can see the two channels that we have created right now.
With the above steps, you have easily mastered how to make a Youtube channel quest. Now let’s move on to how you can set up and optimise your Youtube Channel as a beginner.
Channel Set Up
We have created a raw channel and now we will be setting up the channel so you can upload your first Youtube video and understand how you want to go about your channel. Let’s start with the basics.
Channel Art
Channel art majorly represents the vibe of your channel. This is the branding set up for your Youtube channel which you can customize and play around with at any given point.
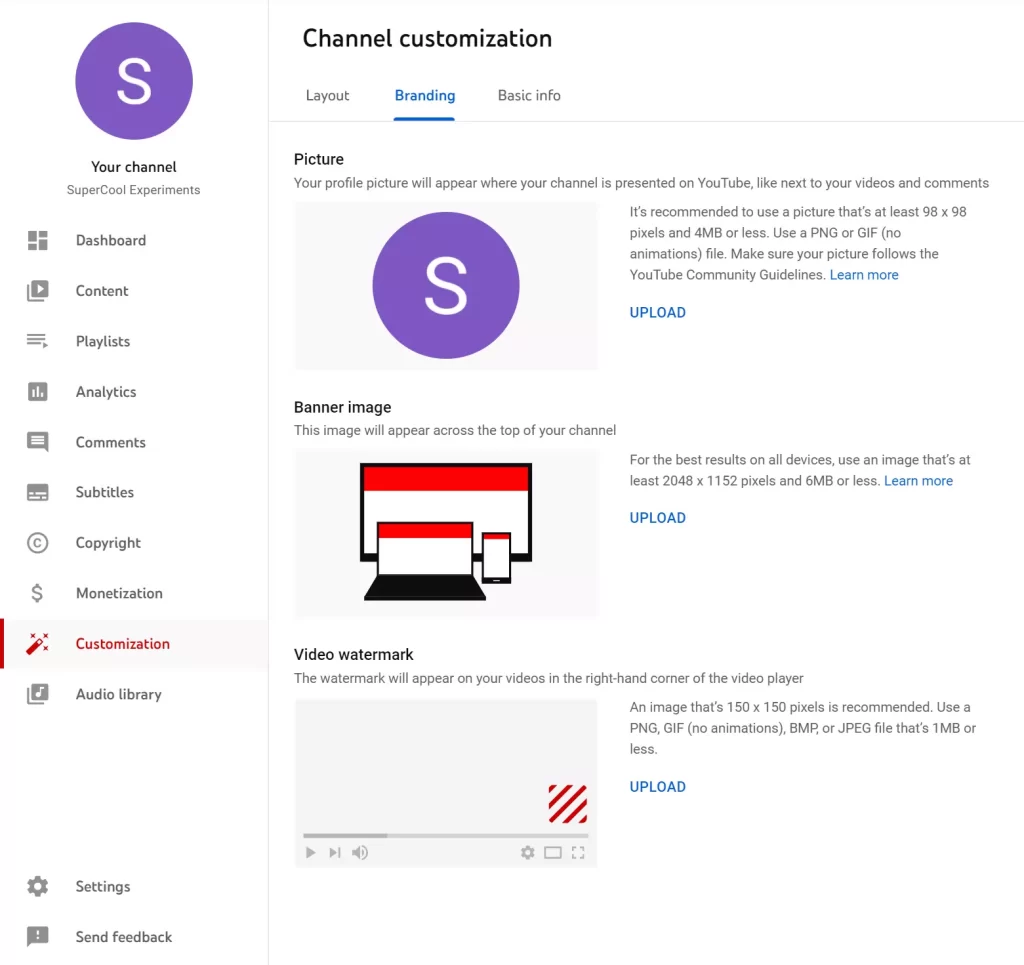
Youtube offers three ways to enhance the look of your channel;
Remember to choose a theme that intensifies your business or content. Also, for the watermark you can add the changes for the duration you need it to appear on your video.
Add Description
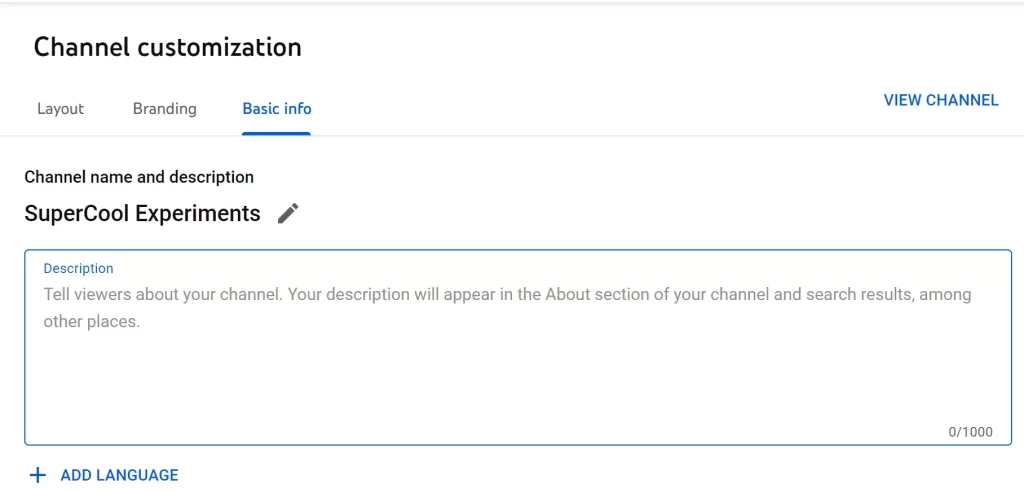
Now for the most important aspect of your Youtube channel set up, a channel description. A channel description is more or less similar to a summary of what your channel or business offers.
This information section needs to cover your motive and working system with a number of keywords so that you can rank in the YouTube suggestions.
Following is how you can add a description to your YouTube channel;
Add Links
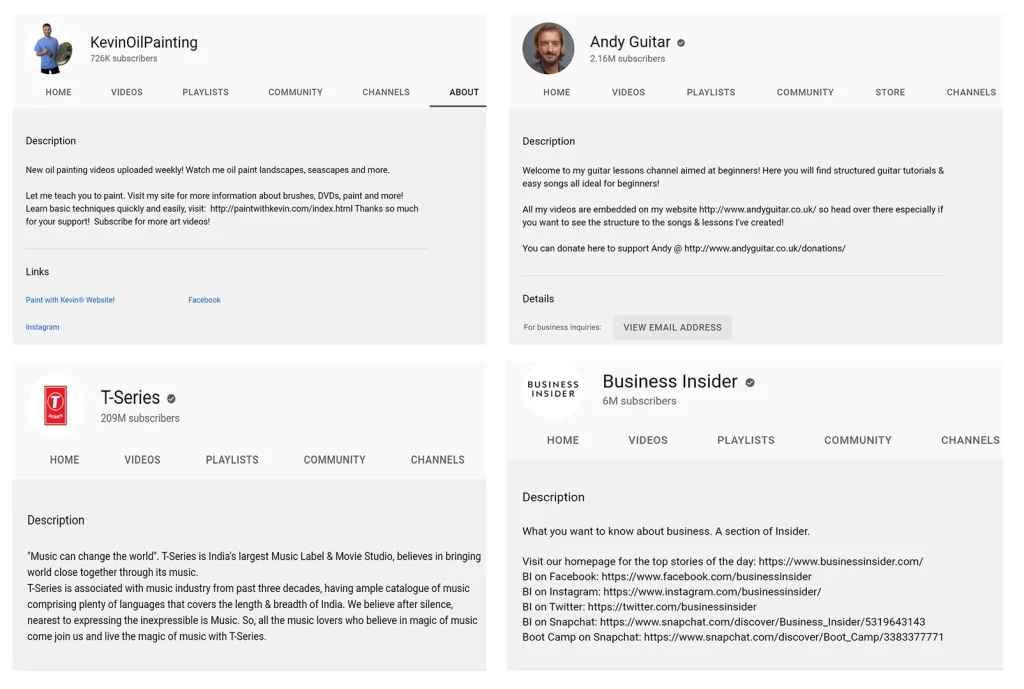
It is very important to cross-promote your content and business for which Youtube offers a separate section where you can add links to your other social media platforms. This can be helpful in generating more audience and reach on all the platforms.
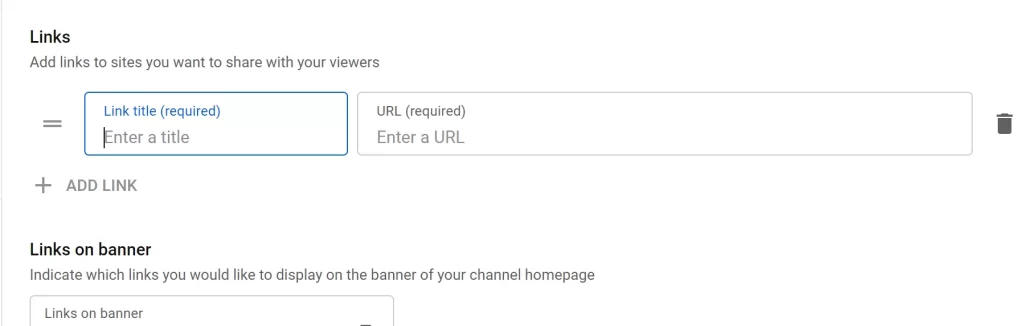
Here, you can observe that you are allowed to add links to Instagram, Blog Websites, LinkedIn, Twitter and more. You can add these links in sequence to your homepage and also add a contact link, for instance, an email address for the viewers to connect with you.
Channel Verification
Now that we have successfully set up our Youtube channel, there are a few hidden features that can be utilised by you to enhance the productivity of your Youtube channel.
For this, you need to complete the verification for your channel which can be achieved easily by following the steps we will be discussing now;
To start, on your YouTube homepage select the channel icon on the top right corner and choose ‘YouTube Studio’ from the list.
You will be now redirected to your channel studio where you need to choose the settings option in the left column and a pop up like the one below will appear. Here, you need to select the ‘Channel’ option on the left and choose ‘Feature Eligibilty’ from the panel.
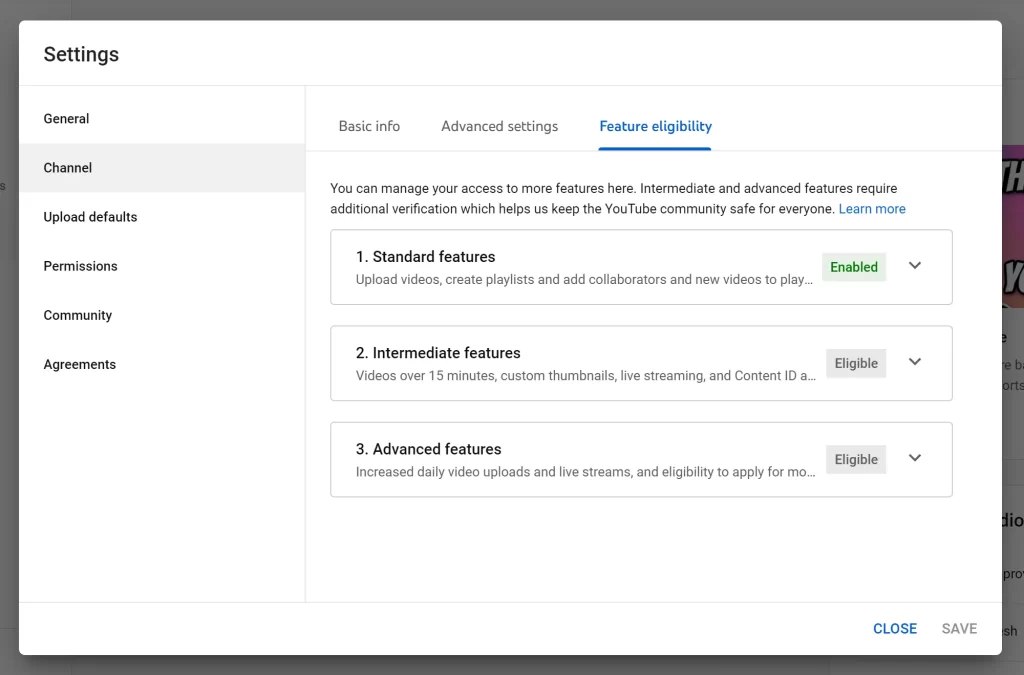
Now you can observe a column that says ‘Intermediate Features’ and is eligible for your channel. Here, you need to verify your channel by hitting the ‘Verify Phone Number’ tab.

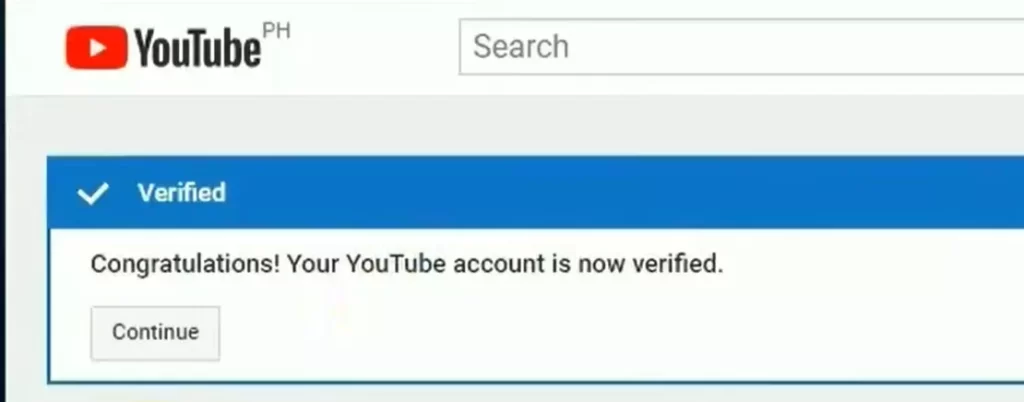
You will be directed to a landing page where you need to add your country and your phone number and hit the ‘Get Code’ option. This will automate the action of sending an OTP to your selected phone number.

Once you get the code you can add that to the page and complete your channel verification.
Benefits
We have completed our verification but why is this step important for your Youtube channel? Let’s further discuss the benefits of this step.
They are just slightly more rewarding in terms of features and are eligible after you enable the ‘Intermediate Features.’ No need to pay extra or perform coding to enable the settings.
Channel Optimisation
We are now moving towards the steps where you can learn how to make a successful youtube channel. YouTube channel like any other media platform works on algorithms and ranking.
In order to get your channel and videos in suggestions, you need to optimise your YouTube channel in a way that it can stand out while staying relevant to the content.
Following are a few ways to optimise your channel;
Relevant Keywords
Algorithms work on specific words or phrases that are most attracted by the users and are searched for and visited more than often. These keywords can be added to your channel description so that they can be easily listed when a user searched that word.
To add these keywords, beeline to ‘Youtube Studio’ the ‘Settings’ and once the dialogue box appears like the one below choose ‘Basic Info’ and add your residing country and keywords.
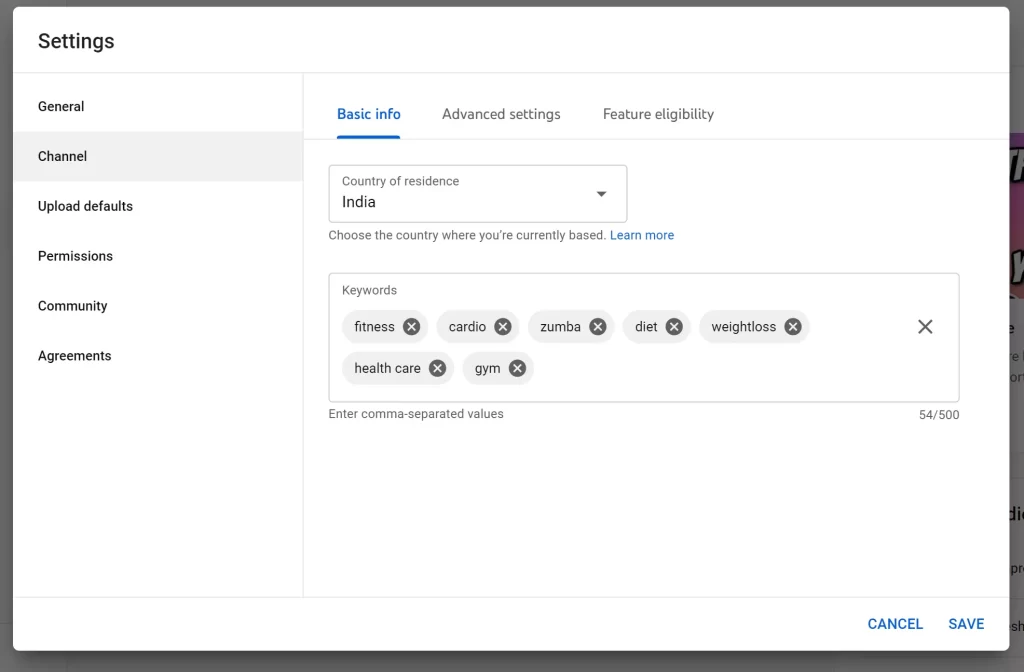
For instance, add keywords like fitness, beginner’s guide to the gym, cardio, Zumba, weight loss, muscle training, among others if your channel revolves around fitness training and diet. This can help your channel rank higher in the searches.
Remember to add keywords in your video titles as well.
Tags
Tags are a synonym for phrase keywords. These are the different ways your video content can be searched on Youtube and hence it is important to foresee this element and add it to your videos.
Here, we will be discussing the two ways to add tags to your channel and videos.
First and foremost, is the upload default method that is all the videos that you will be adding to your channel will always have these tags attached to them.
To use this feature follow the YouTube Studio > Settings > Upload Default steps and add your tags in there for all your videos. This is a useful way when you have a niche or a specified channel.

The second way is to add tags to your video while uploading it to your channel. These tags will be applicable only to that video. Here, you select ‘YouTube Studio’ and then the ‘Create’ option on the top right.
A pop form like the one below will appear where you need to fill in all your video details such as title, description, drip method and others. Scroll down to ‘Tags’, if you cannot see this section click on ‘Show More’.
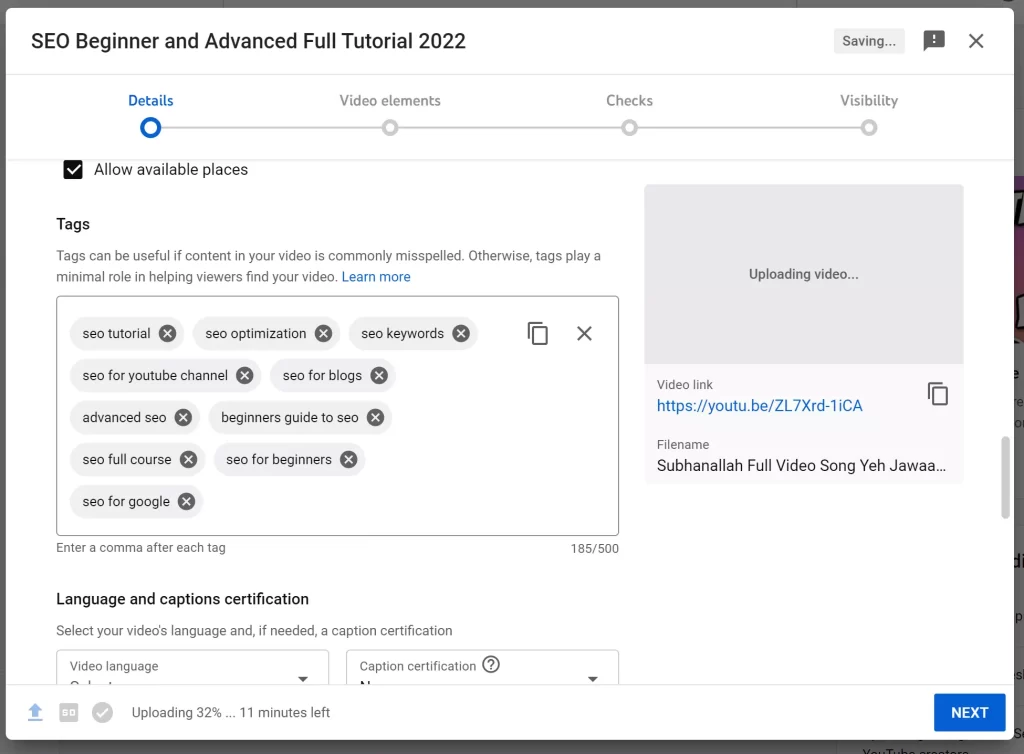
Now you can add your tags to your video and upload it on your channel and whenever someone searched one of these tags your video will be ranked in the suggestions.

And just like that your channel is more efficient and optimised in terms of ranking high and being discovered on YouTube
Uploading Your First Video
We have finally reached the point in our step-by-step guide on how to make a YouTube channel, where we will be uploading our first video. The methods that we will be discussing to upload a youtube video are on the two most popular platforms;
Without any further delay let’s get started on how to start a youtube channel and make money by uploading engaging videos in no time.
Uploading with PC
Upon the completion of your video, select the channel icon on the YouTube homepage and choose ‘YouTube Studio’. Now you can either select ‘Create’ and then upload a video or you can directly choose ‘Upload Videos’ which is located right below the ‘Create tab.’
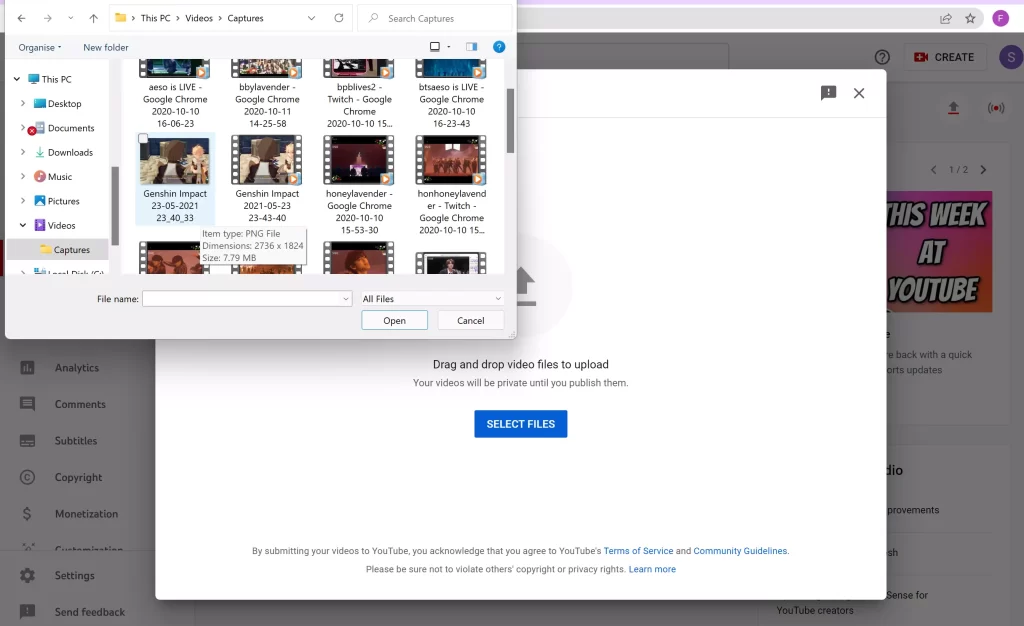
Once you upload your video, you will observe a pop-up form where you can add the title, description, tags, thumbnails, and other features to your video.
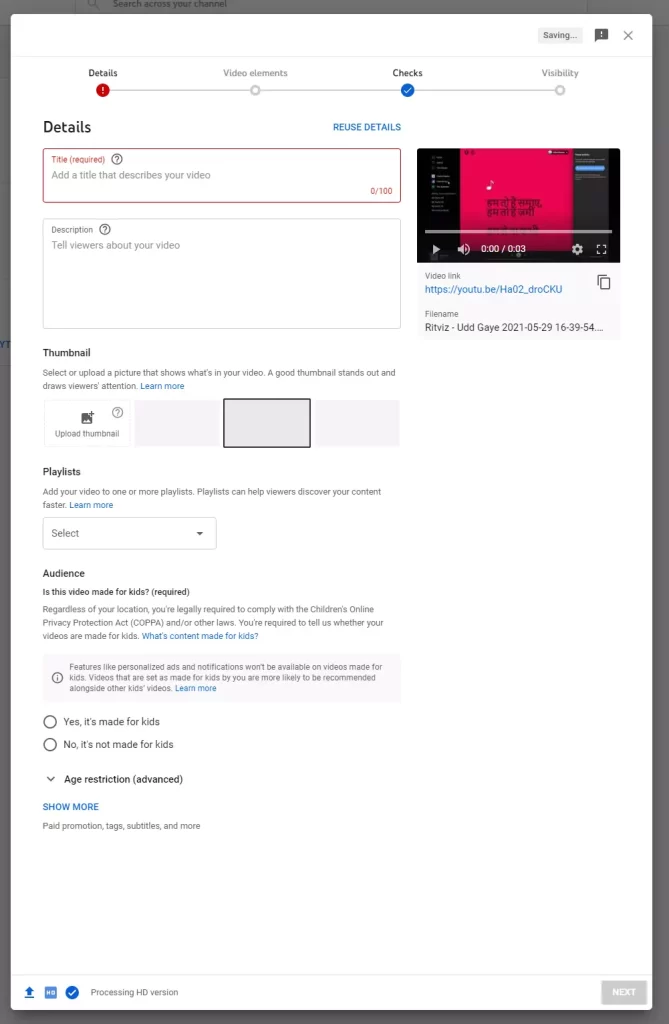
Hit ‘Next’ and you will be shifted to the ‘Video Elements’ panel. Here, you can add cards to your videos. Cards are nothing but interlinks on your channel for your other videos so that the viewer can visit that video as well if needed.
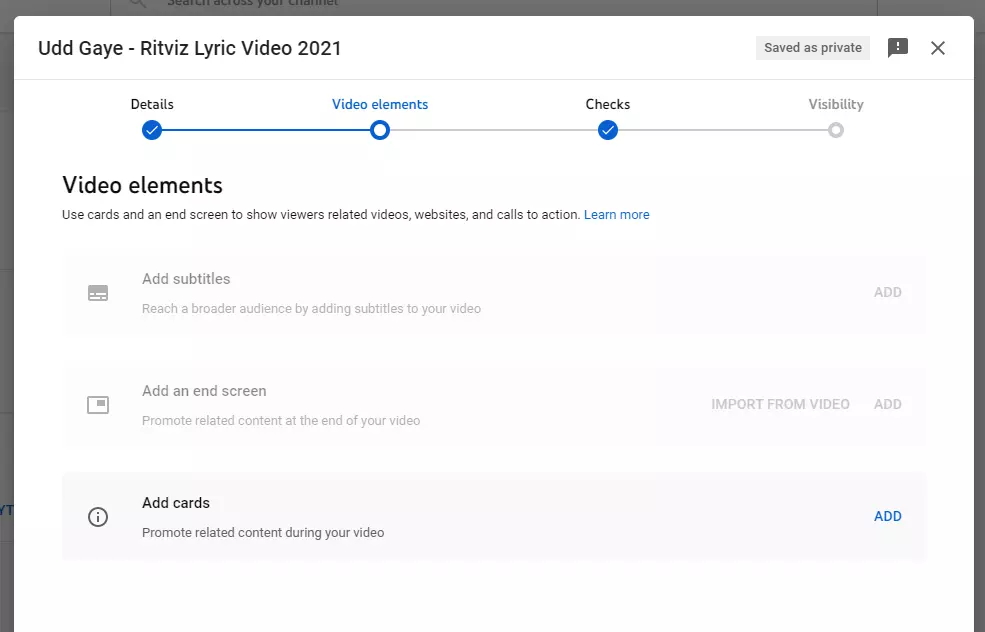
You can also check the copyrights of your audios and the visibility of your video where you want it to be public or private.
And just like that, you have uploaded a video on your YouTube channel.
Uploading with Mobile
There’s no doubt that a majority of YouTube users and content creators use mobile as their sole medium to utilize YouTube. Considering them we will discuss how to make a Youtube Channel on phone and how to upload a video.
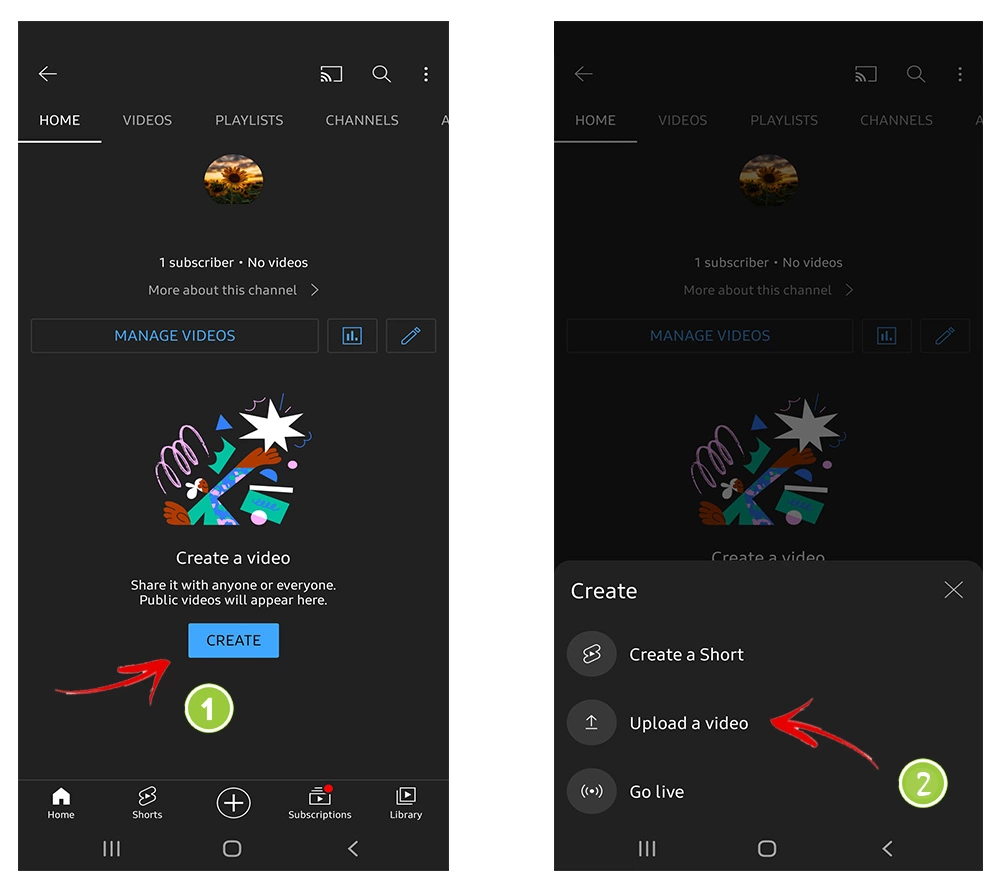
Upon the creation of your channel, which can be done by following the same method, to upload a video on Youtube with your phone go to your homepage by selecting the home icon and then click on your channel icon on the top right.
A drop-down list will follow where you need to choose the ‘Your Channel’ option and click create. You will be asked whether you want to upload a video, a short or a live stream. We will be uploading a video here.
Now you can add in the details like the title, description and visibility settings and then hit ‘Next’. You will be asked if this content is made for kids and after choosing the option hit ‘Upload Video’.
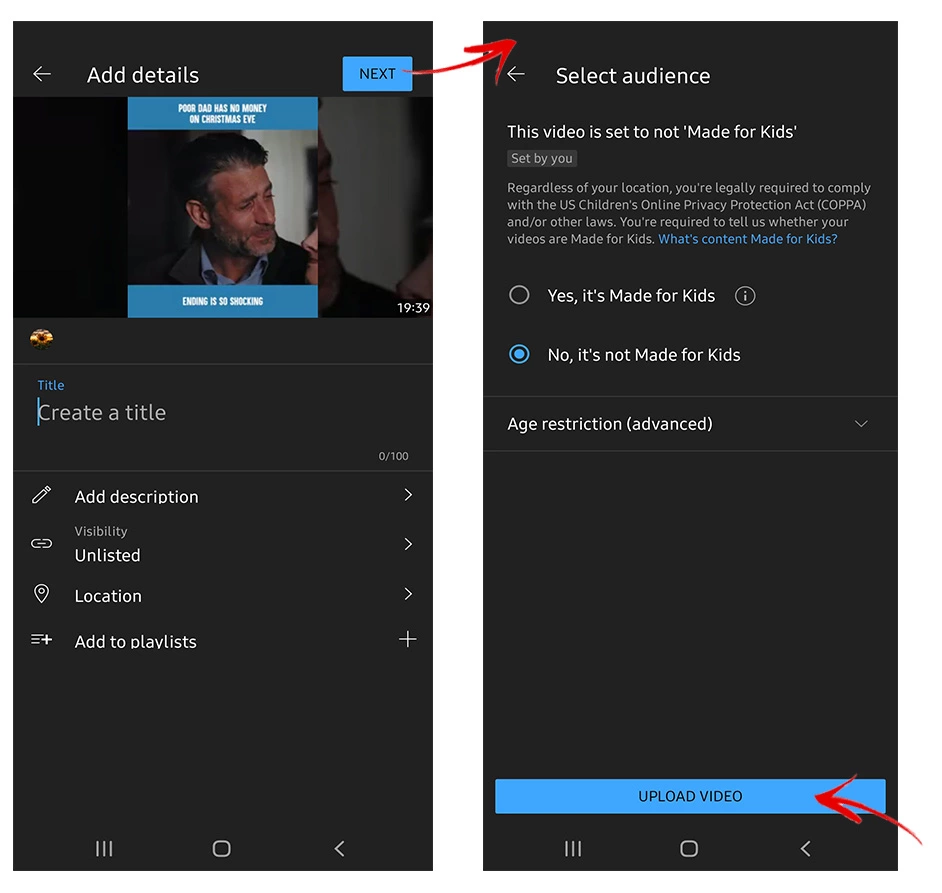
And just like that, you have uploaded a video from your phone to your YouTube channel. The settings are limited but can be utilised to the best if optimised appropriately.
The steps are simple but the impact of the platform is massive and if you haven’t started yet this is your sign to give it a try.
For everyone who is looking forward to expanding their reach and business, YouTube is your best companion.
With that, we would conclude our guide on how to make a YouTube channel!
Is creating a YouTube channel free?
Yes, you can create your channel for free.
How do I activate my YouTube channel?
When you create your channel by following above steps, it will get activated.
How do you start a YouTube channel and get paid?
YouTube opens many monetization opportunities. Some of them are sponsorships, affiliate marketing, Google AdSense, product endorsement and many others.