
The Amazon Product Advertising API in AffiliateBooster fetches following data:
- Image
- Price
- Rating
To use AffiliateBooster with your WordPress website, you will need to connect your website with the Amazon API by creating some credentials.
While the number of websites you can use AffiliateBooster with depends on the plan you get, you can use the credentials you make on several websites.
Before we get into how you can create and manage your Amazon API credentials, here’s a quick overview of the functions of PA-API.
Quick Overview of PA-API
The Amazon Product Advertising API, or PA-API for short, collects product data and sends it over to your website.
It enables users to funnel traffic to Amazon listings easily, and the tool is available only to Amazon Associates.
You can use PA-API to search the Amazon product database for relevant or specific products. It also allows affiliates to read customer and seller reviews so they can gauge the viability of the product for their audience.
Product prices and images can be fetched using the tool. The PA-API empowers affiliates to find products that their audience may find helpful.
One of the API’s primary functions is that it enables Amazon to keep track of the traffic an affiliate drives. If any products are sold from the Amazon marketplace, commissions are paid to the affiliate.
Features
Making informed decisions about the products you advertise is what makes or breaks your website and, ultimately, your business. The Amazon Product Advertising API is loaded with features that make finding and leveraging products a lot easier.
- Affiliate Tag: The API assigns a distinct tag to every Amazon affiliate. The users who visit your website and access the Amazon marketplace through your site also get a tag. These tags enable the API to keep track of the traffic you drive and the sales you help make, and commissions are paid accordingly.
- Search: Some of the many search functions the PA-API performs include ItemSearch, ItemLookup, and SimilarityLookup. The API’s CartCreate and CartAdd tools give you access to shopping cart options.
- Keywords: The API supports keywords that are used to search products on the marketplace.
- AWS Access Key ID: It calls the API and signs the API request.
- Signature: The signature is the hash key created when the affiliate signs the API request. As its name implies, signatures are used for verification purposes.
- Timestamp: It is a function that reveals when a user initiated the API.
- Response Group: This feature enables you to search for product specifics. By default, you are served all of the product details, and you can adjust and narrow the results down with this tool.
- Search Index: The search index shows the category that a product belongs to when a user searches for it. In addition to helping narrow down results, it helps filter out unrelated products.
- Browse Nodes: These categorize items and reveal product relationships.
Amazon Attribution
It is an analytics tool that Amazon added to the PA-API console quite recently. It enables you to track your performance across multiple channels via its unified reporting interface.
Keeping a tab on all of your advertising initiatives and improving your Amazon advertising strategy is a lot easier with Amazon Attribution.
How to Sign Up For PA-API
Before you can sign up to use Amazon's PA-API, you must enroll in the Amazon Associates program.
If you aren’t a member of the program yet, visit the official Associates Central site to learn more and sign up.
After you become a member of the program and have received final acceptance in the program, you can sign up for using Amazon’s Product Advertising API by following the steps below:
#1 Sign into Your Associates Account
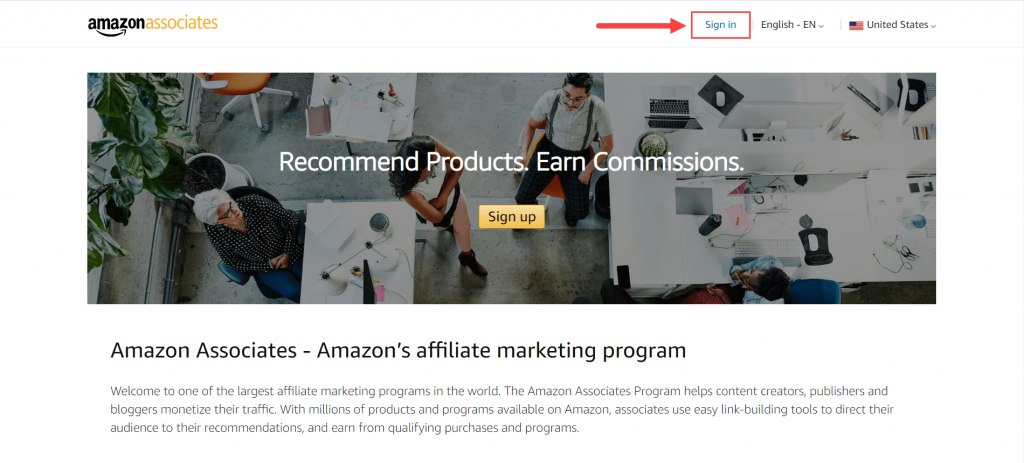
Visit https://affiliate-program.amazon.com/ and click on “Sign In.” After you enter the email and password and log into your account, the dashboard should appear.
Bear in mind that only the primary Amazon Associates account can sign up for the PA-API. If you log in with a secondary account's credentials, you won't be able to execute the next steps.
#2 Navigate to the PA-API Section
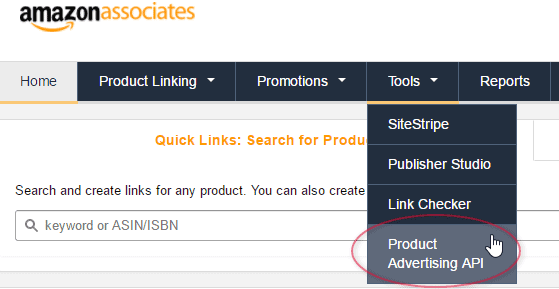
On the dashboard, you will see several drop-down tabs on the navigation bar. Click on the “Tools” tab on the navigation bar, and then click on the “Product Advertising API” option from the drop-down menu.
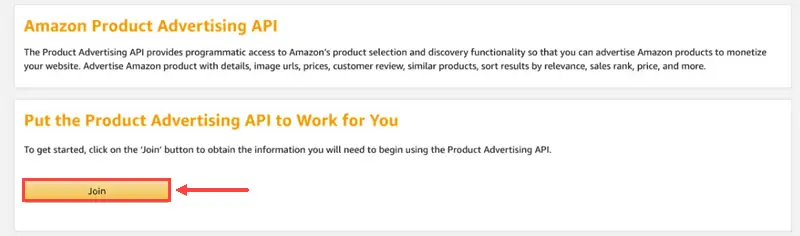
A “Get Started” page will appear, describing the function of the API. To sign up for using the API, click “Join.”
#3 Get Your Credentials
A “Download Credentials” page will appear after you sign up for the API. On the page, you will find your Access Key and your Secret Key for the API.
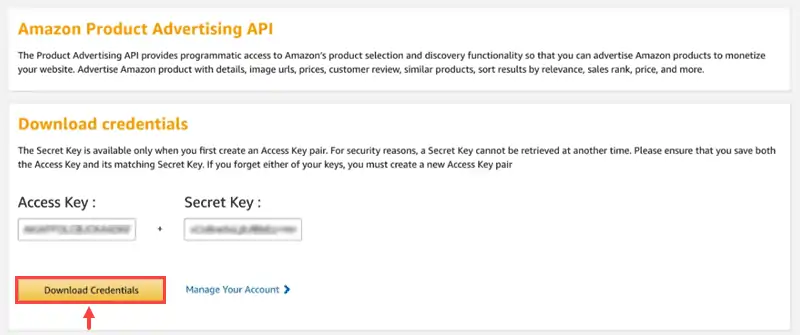
You can either copy these two and paste them into a secure document or click on the “Download Credentials” button below the details.
These are the credentials you will need to specify in your WordPress setup so your website can communicate and make requests to Amazon’s Product Advertising API.
How to Create And Manage Credentials
If you’ve signed up for the API for the first time, you can directly click on the “Manage Your Account” button on the “Download Credentials” page to add or delete credentials.
But if you want to create new credentials or delete them, after signing in, follow the instructions below:
#1 Navigate to the PA-API Section

On the dashboard, you will see several drop-down tabs on the navigation bar. Click on the “Tools” menu, and then click on the “Product Advertising API” option from the drop-down menu.
#2 Navigate To The Credentials Management Screen
The Product Advertising API section will show you two options: “Migrate” and “Manage Credentials.”
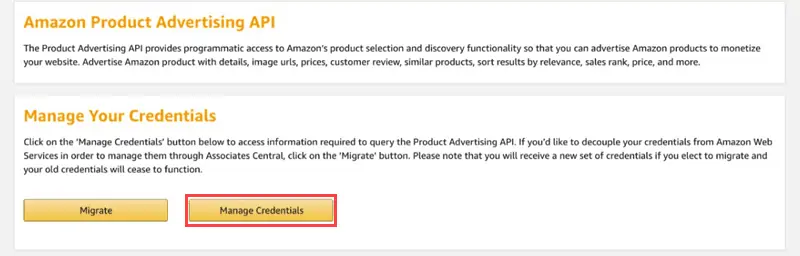
The “Migrate” button will de-link your credentials from AWS and allow you to manage your account from the Associate’s Central. For most users, this option is irrelevant.
You must click on the “Manage Credentials” button.
If a prompt appears like the one in the image below, click on the “Continue to Security Credentials” button.
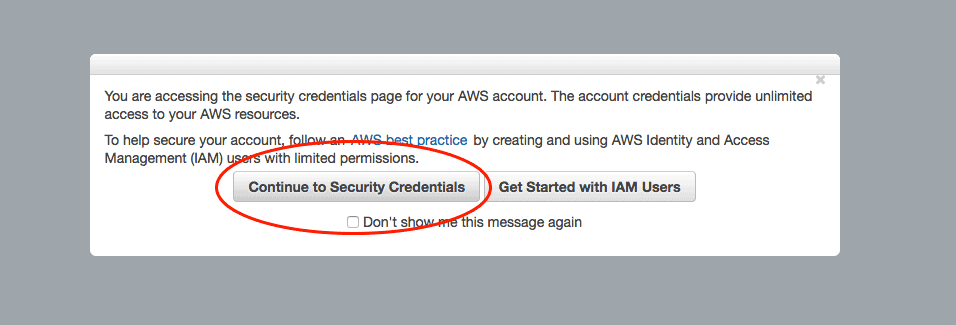
Don’t click on the “Get Started with IAM Users” since it will set up the API to work with user keys, making your website vulnerable to breaches.
#3 Add Credentials
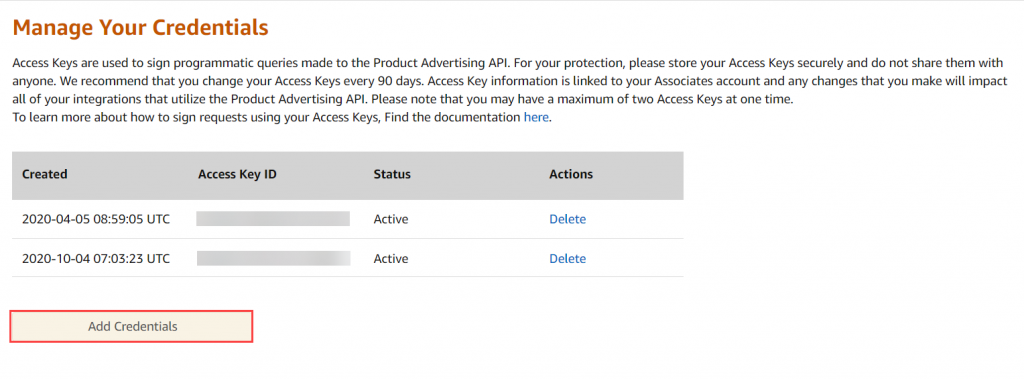
The “Add Credentials” button will appear on the next screen.
Click on it to create new credentials.